;void(0);)
By Sherri Conn Rukes
Introduction
You don’t always need a lens to see a picture, you can use a pinhole camera instead. A pinhole camera uses a small hole that allows light to pass through to allow your eye to see an image. This was the first camera ever used in the 1500s called “camera obscura.”
In this activity, you will create your own pinhole camera to explore the world around you, as well as to better understand how a pinhole camera functions.
Safety Suggestions
- Ask your adult partner for help with cutting.
- Do not look directly at the Sun.
Materials
Version 1
- Clean, empty chips can (Pringles or similar)
- Scissors or box cutter
- Masking tape
- Ruler
- Marker
- Thumbtack, pin, or needle
- Black construction paper
Version 2
- Shoebox, small shipping box, or cereal box
- Scissors
- Masking tape
- Rule
- Marker
- Thumbtack
- Wax paper or white tissue paper
- Black paper
Procedure
Version 1
- Using a clean Pringles can use a marker to draw a line 6 cm (about 2 ½") from the bottom around the whole can.
- Have your adult partner cut the can along the line you drew, using a box cutter or scissors. Remember to keep all the parts, including the cap and both parts of the can.
- With your partner’s help, make a hole with a thumbtack or pin in the center of the metal bottom.
- If the can’s lid is clear plastic, cut out a piece of wax paper or white tissue paper that is the same size as the lid, and place it inside the lid. If your lid is not clear, it will be okay to use as is. Place the lid of the can on the smaller, bottom cylinder.
- Place the top part of the can back on top of the lid. With the help of your partner, tape all three parts tightly together so that it looks like it is all one piece. Next, wrap the black construction paper tightly around the can and tape it shut. If the paper is longer than the can, cut the paper to size.
- Now you are ready to test your camera! Go somewhere where there is enough light. When you are looking in the tube (through the large opening), you want the tube to be as dark as possible, so you might need to use your hands to help keep light from coming into the tube.
- Investigate by looking through your tube at objects around you and notice what you see. The lid makes a screen that shows you things in color, but upside down.
Version 2
- Get an empty cereal box and close it so it is a 3D, rectangular box.
- Place the box flat on a table. In the middle of the bottom panel of the box, make a small hole with a nail.
- On the opposite side of the closed box, have your partner help you cut out a rectangle that is 5 cm x 2 ½ cm (about 2" by 1") in the middle. Make sure the hole that is made on the other end is in the middle of the rectangle you made on the lid side of the box.
- Cover the rectangle opening with a piece of wax paper. Make sure you tape all the sides down, and that the wax paper is tight.
- Take your cereal camera box to a dimly lit room and turn on a lamp.
- Stand about 1.5 M (5 feet) from the lamp and cover yourself and the box with a blanket.
- Hold the cereal camera about an arm’s length away. Make sure the wax paper side is nearest to your face and the small hole is aimed at the light source.
- Move the cereal box camera slowly until you see the image.
How does it work? / Where's the chemistry?
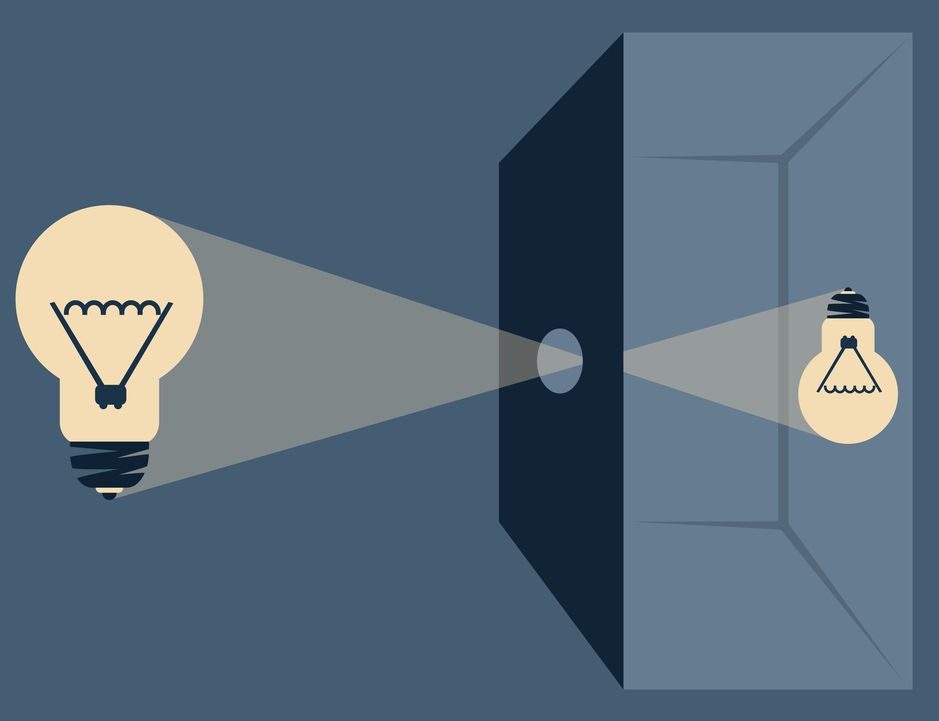
One might think that the hole in a pinhole camera creates the picture, but it does not! All the hole in the can does is make it possible for you to see the image.
So, what is happening? When you are looking at something, light is reflected off of the object toward you, letting you see it. However, if you hold up a piece of white paper in front of what you’re looking at, some of the light will reflect and shine on the paper, but you will not see anything like the actual object. This is because the light bouncing off your object is also overlapping with the light bouncing off other objects. This will cause all the different rays of light to mix and get jumbled together.
This is where the hole helps out. The hole allows just a small part of the light to come in, but not get mixed about. Only a few rays of light reflect off of each point of the object and then travel in the direction of the hole in the camera. Once the light passes through the hole, these rays will reveal an image of the object.
Sherri Conn Rukes is a chemistry teacher at Libertyville High School, Libertyville Illinois.